Wednesday, September 30, 2009

It's Good to Get My Hands Dirty Again...

I've missed this....getting messy, playing, not knowing how things will turn out....The recent projects I've been designing have been rather 'clean' and so its nice to feel that spark of child-like enthusiasm again.....makes me feel like 'me'.

Here's the result of my 'playtime':

Layout Title: "Popcorn" - There's a Reason Why They Call It Popcorn - 'cos you just can't stop going pop! pop! pop! pop! pop! pop!Purple Onion Stamps: Circle Set, Skinny Dip Alpha (I am addicted to colouring these in with white pen)

Wanna Play?
Let's Make An "Exploding Nebula" Background:

You will need:

1. Glimmer Mist
2. Embossing powder (a few colours) and heat gun
3. Liquid glue
4. White Staz On ink

Playtime! (aka Happy Accidents Which Happen When You Can't Find Your Embossing Ink or Glue Pad - See Step 3 and 4)

1. Stamp white shapes with white Staz On ink (I used the ring from the Purple Onion circle set) - these will later give you 'ghostly' images in the background

2. Spray on glimmer mist varying the intensity in different spots patchy is good - this will give you a 'soft cloud' effect - reminds me of a distant galaxy

3. While the glimmer mist is still wet, sprinkle on various colours of embossing powder and heat set. - I poured lime green, yellow, orange and red embossing powder into my hands, then rubbed my hands together (with glee!) to sprinkle the mixed up powders onto the wet glimmer mist - I suppose you could just sprinkle it in the more 'conventional' way, or sprinkle with 3 fingers like a princess, but this way is more fun!4. Draw ' streaks' or 'explosion lines' with liquid glue, sprinkle on white embossing powder and heat set. - The nice thing is that as the embossing powder melts, the liquid glue also starts to bubble which sort of 'raises' your embossing powder taller plus breaks it up a bit and gives it more 'bumps' and texture.

And speaking of playing - a happy hello to the ladies who had fun playing with me in class today! Thanks for the yoguru Val & Caroline!

*sings* - somebody come and play, somebody come and play today....

Monday, September 28, 2009

Inspiration....

I've been reading (lots) and soaking up some inspiration.....while eating... before sleeping....while walking (and almost crashing into a lamp post)... so you can tell these books are pretty cool...

1. "How to Make Books" by Esther K. Smith 
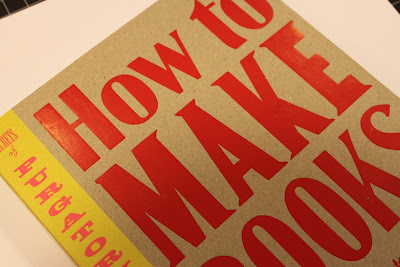
2. "Magic Books & PaperToys" by Esther K. Smith - this woman teaches bookmaking in the U.S....wish I could attend a class...
3. Sew Somerset - Winter 2009 - This project is a Mermaid Tail album by Patricia Winter - it's teal!!! love love love the textures!
4. Somerset Workshop - Autumn 2008 (comes with step by step instructions!!!) - This super unique project is by Jill Marie Shulse. (love how she altered the photos!)
So, here's hoping some of this inspiration rubs off onto my next batch of classes eh? Maybe a teal-coloured mermaid-themed magic bookbinding project with altered photos and papertoys inside?!!! - TIME TO GET ARTSY!!!!

p.s. all titles available at Laine's (I think) and Papermarket (for sure).

Saturday, September 26, 2009

I've Got the Blues...

10 Reasons Why Blue is Better Than Pink:
1. You can use it for both girl and boy layouts.
2. It goes great with brown (one of my other favourites) and almost anything else (see next reason)

3. Jeans are blue and they match anything

4. so is the sky

5. and the ocean

6. teal is a kind of blue

7. Blue is not a Barbie doll colour

8. Blue is also a feeling

9. Both my kids like the colour

10. And so do I


Here are some bluesy layouts I like a lot:

Layout Title: "Don't Ever Forget How Precious This Is"
Corniness Overload:
1. Did you see the finger stamp (Purple Onion) has a little string on it?
2. Elephants....'cos they never forget.
3. Stamp says "A Day to Remember"

4. At first glance the title says "Don't Forget This" but if you look closer at the smaller word stickers it says "Don't Forget How Precious This Is" - secretly pleased at my own little cleverness.

Quite Happy With:
1. The stamped circles - I cut out a circular 'hole' to use as a mask. Then stamped all my 'long' stamps to fill up the circle. Remove the mask and voila!
2. Texture around the circles is a combination of wax, ink and paint
3. The liquid applique ears of the Elephants - you have to try this stuff, it puffs up when you heat it (Laine's has some)

Layout Title: "Hop On"
Best Bit:
Making the 'vines' was the most fun. Here's how you can make them:
1. Separate the strands of twine at one end.
2. Hold one strand in one hand while pushing the other strand downwards with your other hand.
3. The strand will bunch up all nice and curly.
4. Then you can spread it back up a bit so it looks looser.
Learnt this from a Swedish friend - Karin Tolwers - simple and brilliant!

Are you feeling blue too?

Tuesday, September 22, 2009

Didn't Show You the Embarassing Ones...

When hubby and I first got married, we actually wrote down a set of 'rules' to live by. ("Chichak & Peanut's Rules for Living")....Thought this Maya Road Chipboard house album was just the thing for recording this set of 'rules': 
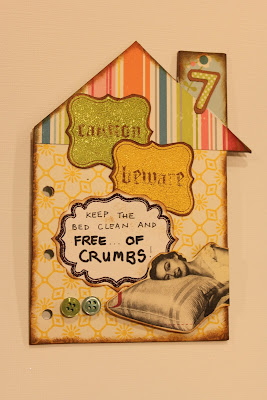
Here's a close up of my favourite bits - using lots of Purple Onion stamp vegetation (how many times have I used this grass stamp???). I am liking this effect - brown embossing on kraft coloured cardstock with white pen outlining....tedious, but strangely satisfying... And here are a couple of pages from the inside - sorry, I can't (actually more like don't want to) show you the others...haha

Don't Go to Bed Angry (this is biblical you know?)Give Each Other Space to Do Their Own Thing Keep Feet Clean and Dry (don't ask...)Keep the Bed Clean and Free of Crumbs (Yes, I like to eat in bed - doesn't everyone?)

So did they work? Well....i'm still happily married so.....:o)

Friday, September 18, 2009

October Sneaky Peeky

Wanted to let you have a sneak peek at the canvas book class I finished which will be premiering at Laine's in October. I like the colours on this one a lot...and I played with the new MT Japanese Washi masking tape that came into the store - fun!And speaking of October classes - go check out Betty's new classes as well - she's got some very cool and interesting things going on - ask her about the handbag!

Plus, we're gonna have a beautiful layout class by Jaz and and a funky layout class by Merdrey as well - October is shaping up to be a fun month!!!

Tuesday, September 15, 2009

SHE did It...

With the new store opening, it seems like a good time to mention this...

I've said it before but its worth saying again.....She's the one behind it all... and I am so grateful for her. I don't know how she does it all...Layout Title: "The Laine Behind Laine's Papeterie"

I Like:
1. The photo - this was taken at an event in our old store classroom (remember the one where you always had to say "excuse me excuse me" when trying to get in or out of your seat?) And there she is hiding in the back making sure everything is going well, leaving the limelight to somebody else...It's not a glam shot, but it 'speaks' to me.

2. Making Paper flowers:

  • Cut strips of pattern paper (about 1 or 2" thick)
  • Start with a centre circle (punched out or cut)
  • Wet your hands and scrunch the pattern paper, gluing around the centre circle. Then build layers of paper going round and round. Keep hands moist so its easier to scrunch the paper.
3. Ribbon Vines:
  • Sketch out where you want your vines to grow and then put glue along the lines.
  • Glue on skinny ribbon, twisting and turning as you come to the curves.
4. Leaves Made with a Circle Punch (happy accident!):
  • Punch out a circle
  • Place the punched out circle back into the punch and take a 'bite' out of it to make a leaf
  • (you can get maybe 3 leaves out of one circle)
  • To get the 'veins' on the leaves - crease and sand on the crease or use an edge scraper (just a leeetle bit)
Gotta go - October project deadlines coming closer.

Thursday, September 10, 2009

The Big Announcement!

Been sitting on this for the longest time.....feels great to finally be able to release the news (pardon the imagery....heh)

Laine's has a new sister store:She's located at Raffles City Basement near Subway and Burger King. Unlike her big sister, she stocks stationery in addition to scrapbooking stuff.....lovely!

And did I mention she's quite a big girl? And very pretty? (you'd expect nothing less from my sis right?)

It's her birthday tomorrow.....come over?

p.s. I'm quite jazzed for you to see the murals on the glass store front.....guess who designed them? ahem.... :o)

There's lots of other cool things to tell you about, but I think I'll let you come meet her for yourself.

And in case you're wondering, yes, I'll still be designing classes for Laine's and maybe one or two for the new store.....I'm gonna be a bit of a yoyo for a while...

Tuesday, September 8, 2009

All Good

He....
- found some pupae to show the kids (they're now in a jar and we're eagerly awaiting the arrival of the butterfly/moth)
- did the laundry without being told
- wants to take the kids guppy fishing in the big drain
- told the kids not to disturb me while I napped
- taught Benny to eat bittergourd
- took the kids to eat Thosai and Prata today

What can I say? He's a good guy.

Layout Title: "Thank You for Tokyo"
Incidentally, in case you're wondering, this layout actually has a transparency base and all the pieces of twill are glued on it to make a 'mesh. Quite like the result.

I've been missing from the store the past few days (if you noticed)....that's 'cos something's brewing and it's gonna be good too. Tell you in a couple of days.

Saturday, September 5, 2009

Not Gonna Do a Micky Mouse Album

I've started scrapping some photos from our trip to Tokyo Disneyland....as you can see there is absolutely no hint of Mickey Mouse anywhere in sight....haha. It's just me, I think....can't quite bring myself to scrap 'Disney'....

Here's Beth....
Layout Title: "Dream Your Dreams"This is actually rather a fun and quick way to design a page. It's all designed around the transparency which I designed on Microsoft word. A few spritzes of glimmer mist, a few bits of ribbon and bling and voila, done!

Happy (little) Experiment:
I sprayed the yellow glimmer mist on first and while it was still wet, I spritzed some pink glimmer mist on the back of my transparency, then smooshed it down on top of the yellow. The colours blended a bit like a wet-in-wet watercolour wash - which is nice....a little bit different from spraying directly. Hmmm....maybe will try with other colours?

And here's Benny...

Layout Title: "How to Keep Your 6 Yr Old Happy on a 8 hour Flight"
My Favourite Bits:
1. The metal chain running down the middle
2. The photos of course! (just look at that face!!!)
3.
The fact that I, (an ex English teacher and Eng Lang grad) wrote "a 8 hour flight" instead of "an 8 hour flight" - haha.

Well, that's it for now. You'll probably be seeing more of my Tokyo photos in my layouts....just don't expect to see any Mickeys (hidden or otherwise) on there anytime soon.

Tuesday, September 1, 2009

A Layout and An Announcement

This is the layout that was everybody's favourite in August (or so I hear...)

Layout Title: ChildhoodI really like the messiness of it and also enjoyed using those fabric embellishments from Crafty Secrets. (My favourite bit is the little bit of frayed fabric tucked under the left side of the photo)

A special thank you to Betty for the dictionary paper - I feel it adds just the right touch to the page. Wouldn't quite work without it. Hmm....I think I need to go shopping at the second hand bookstore and get me a nice big old dictionary to rip apart.

Did You Hear?
If you read the September Laine's Newsletter, you'd know that our Design Team has expanded to include 3 lovely new ladies: Yanni, Merdrey and Jaz. They each have such unique and beautiful styles - its going to be really great having them on the team!

Merdrey's got a class debuting in September and look out for a class from Jaz coming up soon too - don't miss them!

As for me....I've started brewing October's classes already. Head is full - in a good way.